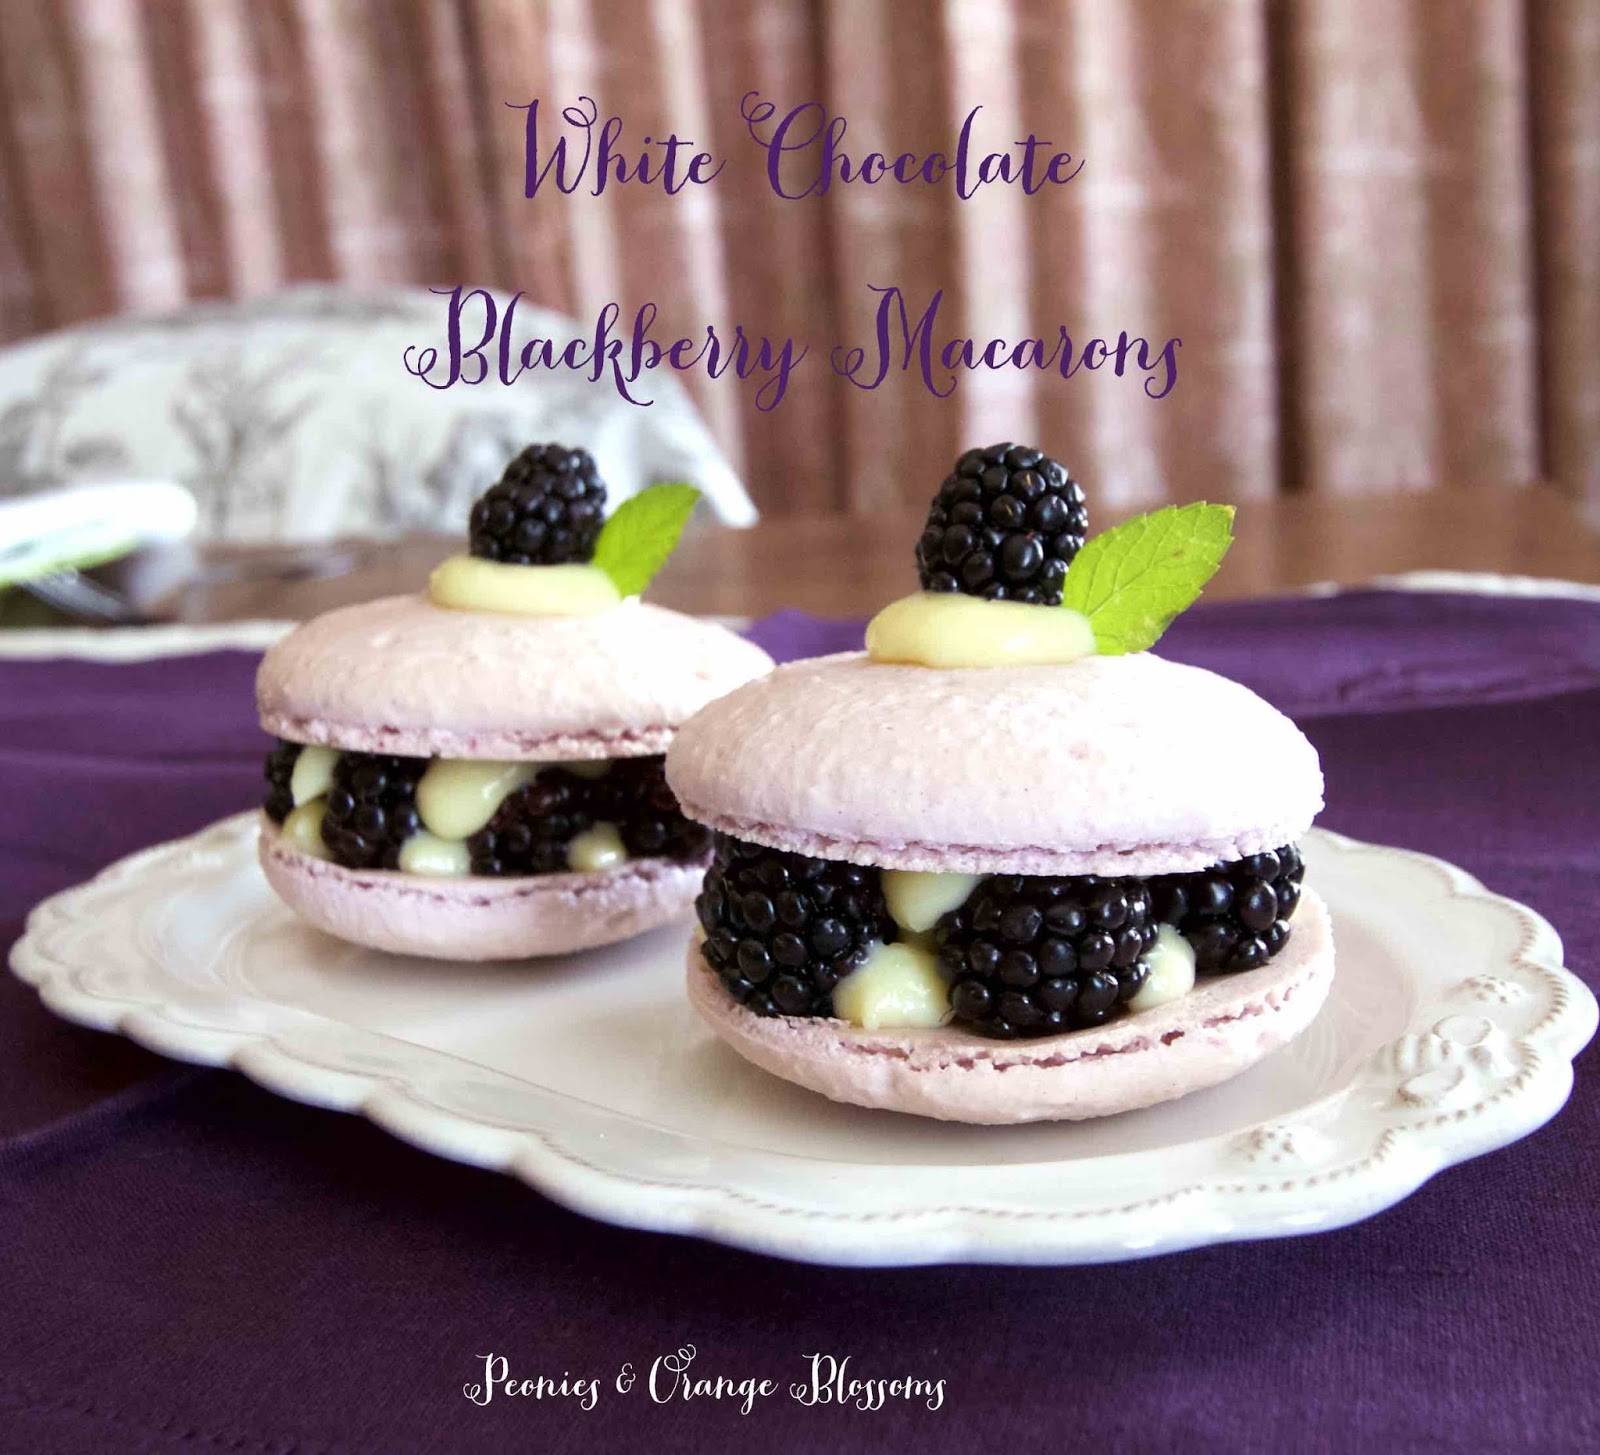
I’ve been back in the kitchen baking again. You will love what I came up with! I was inspired ball of the pretty french pastries I saw in Paris! White chocolate blackberry macarons!
This post may contain affiliate links.
 |
White Chocolate Blackberry Macarons – printable recipe here
We will need 2 cups of fresh blackberries, but will not use them until the very end.
Materials needed: (affiliate links are used for your convenience)
-
- parchment paper or silpat (I like this silpat made in France)
- silicone spatula
- electric mixer (your hand will get tired whipping the meringue, I use this super professional one in cherry red, but this model is wonderful too! )
- a food scale (yes, you need this. I use this one)
- a piping tip and piping bag (I like the ateco #806, I use these tips and piping bag)
- Food coloring (the gels or dry powder works best, not the liquid store stuff)
- A macaron template
- food processor (I use this one)
Macaron Shell Recipe (from Laduree)
275g ground almonds
250g powdered sugar
210g egg whites
210g granulated sugar
1. Mix almond meal and the powdered sugar in a food processor. Be careful not to grind too long, otherwise it will form a paste.
2. Sift the almonds and powdered sugar. Set aside.
3. Weigh out granulated sugar.
4. Weigh the egg whites. Beat them slowly on a low speed until foamy. SLOWLY add the granulated sugar to the egg whites as you beat. Once all mixed, increase speed to medium and beat until a firm meringue forms. You want a firm meringue with glossy peaks but not stiff peaks. They should defy gravity and remain in the bowl if you turn it upside down. If you tilt your bowl to the side and they are sliding out, keep beating.
5. Add the food coloring gel and mix.
6. Then fold in 1/3rd of the almond/sugar mixture into the meringue with a silicone spatula. Once combined, add another third of the almond mixture. Add last bit. This batter requires more deflation during this step since it creates such a poofy meringue.
7. Add the batter to a piping bag. Pipe in rows using your template onto parchment paper. These macarons are a bit bigger than your usual macarons – 7cm in diameter. To make my template I found a round glass that measured 7cm and drew around it.
8. Pick up the pan and beat until the counter. The cookies need to rest on the counter between 30-60 minutes. They are ready to go in the oven when they are dry to touch (the shell shouldn’t stick to your finger)
9. Set the oven to 300F.
10. Bake the cookies for 15-20 minutes, one sheet at a time. They are done when they look kind of matte and seem firm when you lightly tap on them. You can always rescue a slightly overcooked one with the maturation process that comes later, but you cannot rescue an undercooked one!! The cooking time really depends on your oven.
11. Remove from paper once completely cool. If they stick to the paper, they aren’t cool yet. Or you undercooked them.
 |
| miam miam |
White Chocolate Cream Filling
- 1 large egg + 1 egg yolk
- 85g granulated sugar (about 1/4 cup + 2tbsp)
- 1 cup milk (doesn’t matter whole milk vs nonfat, I used 1%)
- 29g cornstarch (3tbsp)
- 119g white chocolate (4ounces)
- 28g butter (2tbsp)
- Beat the egg, egg yolk, and the 1/4 cup of sugar together in a mixer until pale yellow and thick. This takes about 4 minutes.
- Add the cornstarch, mix on medium-low until mixed in.
- Mix the milk and the remaining 2 tbsp of sugar on a saucier pan over heat. Bring it to a boil.
- Once boiling, pour half of the milk slowly into the egg mixture and whisk constantly.
- Then pour the entire mixture back into the remaining milk in the saucepan. Bring up to a boil to thicken on low.
- You must whisk continuously to make sure that it doesn’t burn on the bottom, This takes several minutes. If it burns, you must throw away and start over.
- The pastry cream will suddenly thicken. Once it thickens, add the white chocolate and mix together thoroughly until chocolate is melted. Remember we are only melting the chocolate, not cooking it!
- Put a piece of saran wrap directly onto the surface of your cream and place it in the refrigerator. Let cool for 1-2 hours before using.
Assembling the macarons!
On one shell, form a ring of blackberries on the edge. Using a piping bag, pipe the white chocolate cream into the center of the blackberry ring.Then put another macaron shell on top to make a sandwich. For looks, pipe a little dollop around each blackberry so it appears to be sandwiched between white chocolate cream.
For garnish, pipe a little dollop of cream on top, add a blackberry, and sprig of fresh mint. Voila! You, too, are a pastry chef!
Below is a picture of what I mean by putting the blackberries on the edge and adding the cream to the center. As you can see, my recipe was inspired by a raspberry rose version I had in Paris. Except… I never saw a blackberry one there! So I came up with my own!
 |
| this is what I mean by putting a ring of berries on the edge and piping cream into the center! |
These were really very good. I struggled with piping the larger 7cm macaron shells. The oven here is super crappy, in fact, we are getting a new one. I had the oven set at 300 and it ranged from 250-350F! You just have to practice. I had some trays of flops… and some trays of nice ones! I am very happy that these turned up with feet and I got the perfect flat top too!














Very beautiful, Angelina! I love to bake, but macarons aren't something I would dare attempt. I hate having flops, usually refrain from ever making that recipe, again.
I hate having flops too, and with savory foods I usually give up on the recipe! For some reason though I become determined to make it right with desserts!
Oh, these look amazing! So pretty! I love macarons – haven't attempted to make them yet.
Maybe this Fall when the weather cools down 🙂
Wow, Angelina! These are very impressive. I think your blackberry version tops the raspberry French version. Making macarons is a talent in itself. Looks like you have it down. Thanks for the recipe. I'm printing this off to add to my files. You know, just in case I actually get inspired to make my own macarons. '-)
oh thank you for the compliments! BTW it took me forever to figure out how to do printable recipes !
The pictures look amazing! If they taste as good as the pictures look I am guessing they were delicious.
They tasted just as good as they look!
These are so pretty and sound delicious!
Oh thank you! They also are pretty scrumptious tasting too!
lovely! and perfect for our month's theme of #ParisinJuly !
Thank you! i am finding my life theme partially revolves around French things.
Holy Macaroon, these are incredible!
Jenna
Oh thank you!
These look amazing! I am not sure I could eat one, they are so beautiful. Though I am sure I would get over it!
I didn't think I could eat one either… but quickly got over it when it tasted so yummy!
I love how you have brought home a little bit of Paris. Your photos are amazingly beautiful, and you macarons look enticing. I am petrified to make them, howiever. Such a sissy baby. LOL Have a great weekend!
You should give it a try! I didn't include pictures of my 2 trays of major flops… I actually did take pictures of them to show everyone I make mistakes too, but when I took the picture I was giggling so much my picture is super blurry too! Even the picture was a mistake and thus the world will never see my undercooked hot messes left stuck on the silpat!
These look so gorgeous and tasty! The pictures stopped me dead in my tracks. Now I am starving for a sweet.
Thanks for sharing.
I am glad you enjoyed my photography! The sweets were really yummy, I wish the Internet would let us handout samples like Costco!
How extra pretty are these! Thanks for sharing at Home Sweet Home!
oh thank you!! First time I've ever made them!
These look absolutely beautiful! I still have not gotten up the courage to try making macarons. I love them so much so I'm going to have to eventually!
I was daunted at first too, but when I realized how much money I could save if I made them myself…well, I hopped right to it!